|
Arado Ar 234B Cockpit
Cutting Edge Modelworks
S
u m m a r y
|
| Catalogue Number
and Description: |
CEC48406 Arado Ar 234B Super
Detailed Cockpit for Hasegawa. |
| Scale: |
1/48 |
| Contents and Media: |
20 parts in grey resin (including a few spare
levers/handles) |
| Price: |
USD$11.99 from Meteor
Productions website |
| Review Type: |
FirstLook and
Construction |
| Advantages: |
Accurate and complete; only replaces what needs
replacing; will be very visible behind the clear nose of the Ar
234; crisp details; perfect casting; minimal cleanup required; good
instructions |
| Disadvantages: |
|
| Recommendation: |
Highly Recommended |
Reviewed by Brett Green

HyperScale is proudly sponsored by Meteor
Productions
Hasegawa's new 1/48 scale Arado Ar 234B is an excellent
kit.
The cockpit is a crucial area of this model, because the
large clear nose will reveal all the detail inside. Fortunately, Hasegawa
has done a nice job with this aspect of the kit and many modellers will be
perfectly happy with he cockpit straight from the box. However, the
limitations of injection moulding technology, and some missing parts from
the research subject at the National Air and Space Museum, means that
there is room for improvement and addition.
Cutting Edge has released a cockpit update set for the
Hasegawa 1/48 scale Arado Ar 234. This resin set acknowledges that most of
the cockpit is very good already, and therefore concentrates only on the
areas that need improvement.
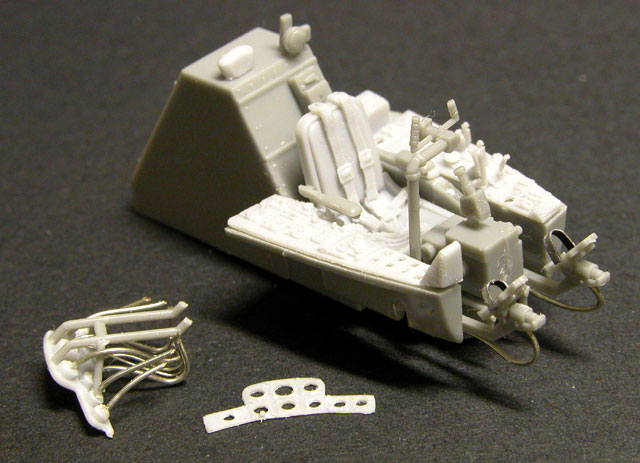
20 parts in grey resin are supplied on three casting
blocks. The parts can be easily removed with a sharp knife, but I found
that my side cutters were helpful in nibbling away the block from
underneath the replacement seat.
The resin parts on my sample are free of any
imperfections, and casting is up to the usual high Cutting Edge standard.
A small acetate sheet with printed instruments is also provided.
The highlights of the set are the seat with its cast-on
backrest and harness, the crisply detailed side consoles and a two-piece
panel with raised instrument housings on the back. The batch of small
details will add an authentically busy atmosphere to the cockpit and, even
better, it will all be visible through the clear nose.
Instructions are also good. Ten drawings and photographs
accompany the instruction text, but there are no real traps to assembling
this simple detail set. The instructions do suggest the addition of
"wiring" behind the instrument panel from stretched sprue or fusewire, as
this area is very exposed to view.
I have been looking for an excuse to start my Hasegawa
Arado Ar 234, and the arrival of the Cutting Edge cockpit was the trigger.
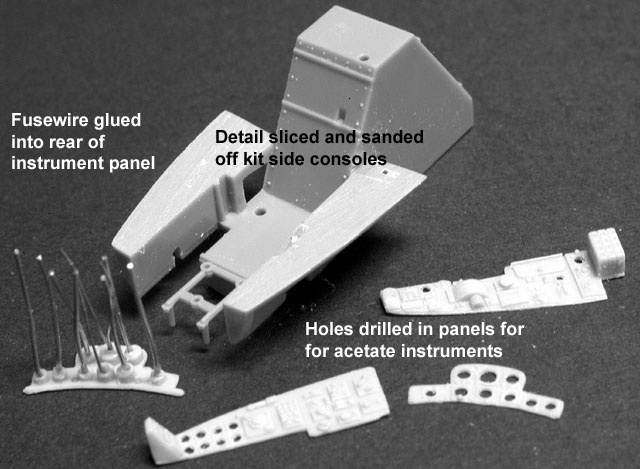
Preparing the Kit Parts
First, the kit parts were prepared. The basic kit cockpit
tub is retained, but the raised detail on the side consoles must be
removed. I scraped the higher features off with a sharp hobby knife, then
sanded off the remainder with a coarse sanding stick.
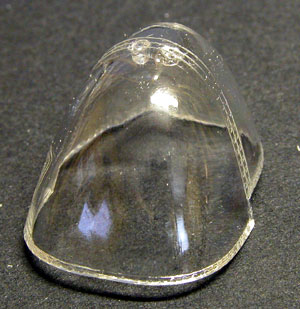
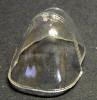
The clear nose part (Hasegawa part no. P1) has a slight
step and moulding seam running from top to bottom along the centreline. I
started by scraping the seam line with the blade of a hobby knife until
the step was eliminated. Next, I sanded the now-cloudy band down the
centre of the nose with progressively finer grit sanding sticks. When the
visible scratches were hidden, I applied a generous coat of Gunze Mr
Polishing Compound (although toothpaste does a good job too), waited for
it to dry, then polished the compound off the clear plastic. After a final
buffing with a sanding stick, the seam line was officially gone!
It is important to further prepare the clear kit parts
with a thorough soaking bath in Future floor polish. This will vaccinate
the canopy from fogging when resin parts are glued to the plastic. It will
also bestow a sparkling shine to the canopy.
Assembly and Detailing
Holes were drilled for instruments as required, and these
parts were then thinned down by gently rubbing them against a medium grit
sanding stick. I prefer to drill my instrument holes first to avoid
possible later damage to the thinned resin part.
Click the thumbnails below
to view larger images:
|
|

|
|
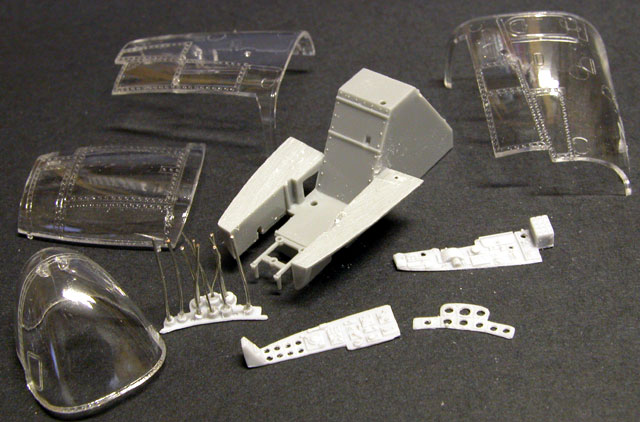
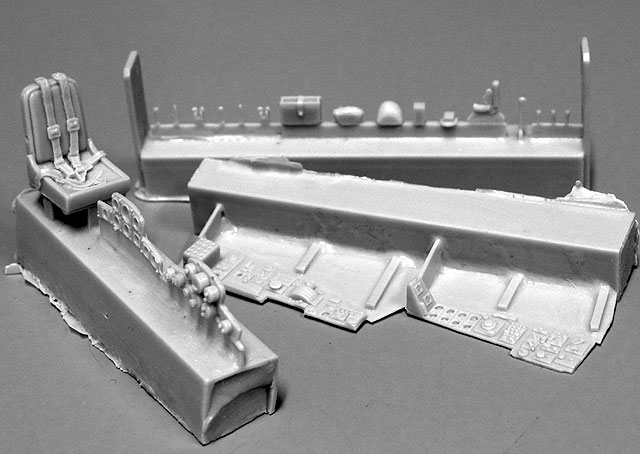
The main components, separated and prepared for painting
|
|
|
|
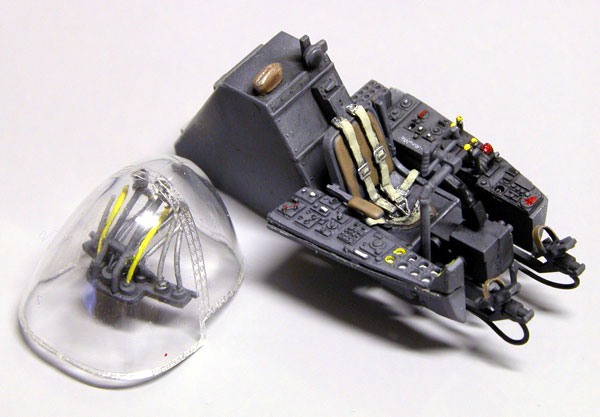
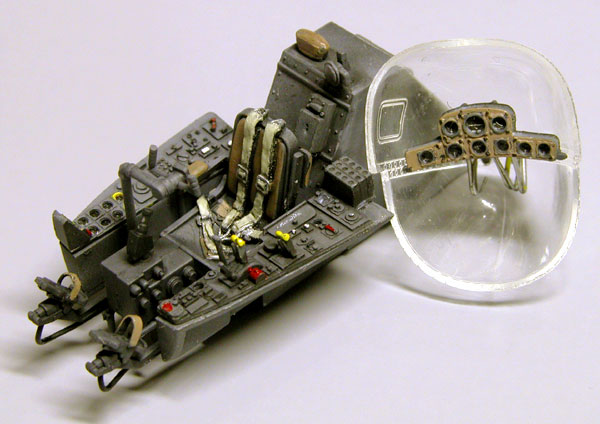
The detail will all be clearly visible through the large clear nose of the Ar 234
|
|
|
|
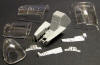
A centreline seam and step have been scraped, sanded and polished off the front of the canopy. A bath in Future Floor Wax completes this little job
|
|

|
|
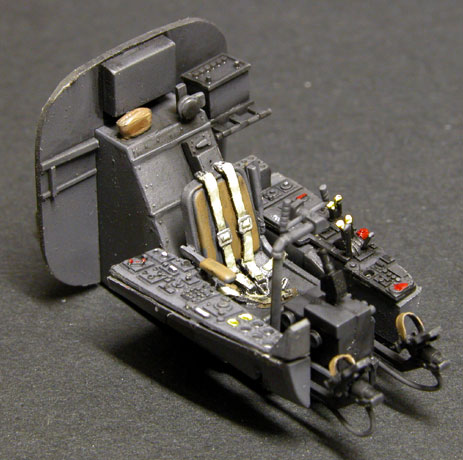
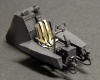
Wiring has been added to the rear of the instrument panel. In hindsight, I might have gone a little overboard!
|
|
|
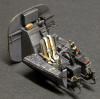
One small hole was drilled in the back of each instrument
housing with a pin vise. Fusewire of two different gauges was inserted in
the holes. The instrument panel mount (a kit part) was glued to the back
of the instrument panel then the fusewire was bent to shape with
electrical pliers. The long wire was cut off at a length and height that
would meet with the widthways canopy frame that wraps around the nose.
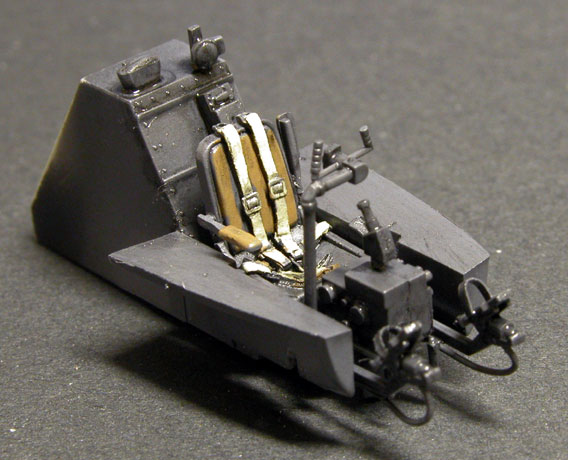
The kit-supplied armrests were glued to the resin seat. I
eventually repositioned the port-side armrest in the "up" position, as it
looks like it would have otherwise interfered with access to the throttles
and levers on the side console. The tiny levers were added to the throttle
an fuel control quadrants with the aid of tweezers. Spare parts are
supplied in the event that any of your levers take the long, one-way trip
to the carpet.
The kit bombsight, control column, rudder supports and
pedals plus some extra detail including rudder foot straps and plumbing to
the rudder assembly was added to the plastic cockpit tub. The resin parts
were test-fitted with no problems, but not glued in place just yet.
Painting and Weathering
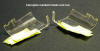
The canopy was masked with Tamiya masking tape, inside and
out. The sub-assemblies including the seat, side consoles and instrument
panel, were then temporarily secured to a piece of cardboard. All these
parts were sprayed flat black.
A coat of dark grey was then sprayed from a single angle.
This meant that a "shadow" of black remained visible from certain angles.
Before going any further, I painted the seat backrest
brown and the harness straps off-white. A wash of thinned black oil paint
was then applied to the cockpit tub, the side consoles, both sides of the
instrument panel and the seat.
After waiting a few hours, the wet excess oil wash was
swabbed off, and a coat of Polly Scale acrylic Flat was sprayed overall.
Details such as lever knobs, instrument surrounds and harness buckles were
picked out with a fine brush.
Finally, the acetate instruments were wedged between the
panels, glued into place and the seat was secured in the cockpit tub.
Click the thumbnails below
to view larger images:
|
|
|
|
Canopy halves are masked on both sides in preparation for spraying the interior colour
|
|
|
|
The base coat has been applied and the black oil wash is still wet on the parts
|
|
|
|
Almost finished - just a little tidying up still to do
|
|
|
Cutting Edge's 1/48 scale cockpit set for the new Hasegawa
Arado Ar 234 will add plenty of useful detail to this highly visible area
of the model.
I probably spent four hours or so stretched over a single
day to get the cockpit to this stage, and I consider that was a good
investment of my time considering the result.
Highly Recommended.
Thanks to Meteor Productions for the review sample
Cutting Edge Modelworks accessories are
available online from
Meteor Productions website

Hasegawa's
1/48 scale Arado Ar 234 is available online from
Squadron.com Text and Images Copyright by
© Brett T Green
Page Created 19 September, 2002
Last updated 22 July, 2003
Back to HyperScale Main Page
Back to Reviews Page
|
 Home | What's
New | Features
| Gallery |
Reviews | Reference
| Forum
| Search
Home | What's
New | Features
| Gallery |
Reviews | Reference
| Forum
| Search