 Home | What's
New | Features
| Gallery |
Reviews | Reference
| Forum
| Search
Home | What's
New | Features
| Gallery |
Reviews | Reference
| Forum
| Search
|
|
|
Fairey Battle Classic Airframes
Reviewed by Brett Green
Nevertheless, the Battle formed the spearhead of the RAF's tactical bombing operations in France during 1940. The light bomber suffered terribly at the hands of the vastly superior Messerschmitt Bf 109E and ground defences. As soon as possible, Battles were withdrawn to trainer and target-tug duties. Total production of the Fairey Battle was 2,185 including 364 in service with the RAAF in Australia. Classic Airframes have brought us some interesting subjects over the years. This time they continue their RAF theme commenced with their recent Whirlwind (construction review here on HyperScale). Classic Airframes is a short-run model manufacturer. They bring us modelling subjects that would otherwise probably not see the light of day. The price for these unique subjects is the requirement for a little extra modelling work. Classic Airframes' models are usually mixed media incorporating low-pressure injection moulded plastic parts, resin, vacform and sometimes brass. The plastic is not of the same quality as we have come to expect from Tamiya or Hasegawa. There is usually flash present, there are no locating pins, alignment can be tricky and fit is often far from perfect. Yet with a little forethought and effort, a good representation can be achieved.
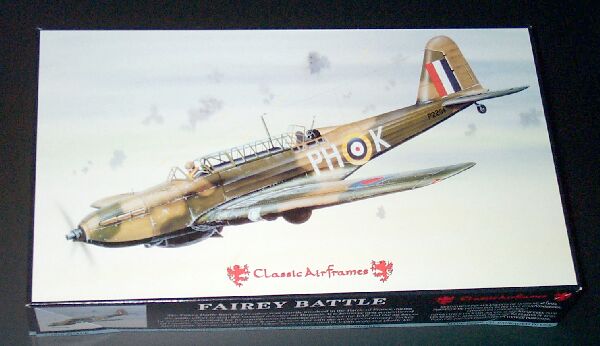
The box for Classic Airframes' Fairey Battle features nice artwork of FO Garland, VC's aircraft in flight. The picture depicts a fabric-covered fuselage but don't fret - the plastic parts correctly represent the stressed-metal skin. The first impression is the size of this aircraft. It is big. Comparison with my Battle references indicate that the kit dimensions are very close to scale; but that the length quoted in the instructions is 10 feet too long! The kit comprises 51 plastic parts, 28 resin parts and 2 sets of 3 clear vacformed parts.
Panel line detail is crisp, fine and consistent. Lines distinguishing the rudder, ailerons and elevators are engraved slightly deeper than the rest of the panels. Fabric control surfaces look good too. The resin parts are very nice indeed. Detail is crisp, undercuts are well represented and there are no casting flaws or pinholes on my sample. The resin parts mainly deal with the cockpits, radiator grille, propeller hub and some wheel well detail. The Vickers' "K" gun, pilot's seat, cockpit sidewalls and the radio operator's perforated seat-back are all highlights.
Vacform parts are supplied for the long glasshouse canopy and "optional" landing lights (all Battles carried landing lights - the option is whether to use the vac and resin parts, or whether to paint the appropriate part of the wing leading edge silver). These parts are crystal-clear. The pilot's sliding section is depicted dead flat. Some pictures seem to show that this section was slightly bulged, but I cannot determine whether this was only a feature of later aircraft. Check your references and decide for yourselves. A few options are offered. These include different positions for the Vickers "K" gun (i.e., stowed or at the ready), resin/vacform landing lights and two styles of propeller hub.
Instructions come in the form of a six-page booklet. The ten steps describe the construction in illustrations and descriptions. The instructions helpfully remind the modeller about some of the extra work required by the limited-run medium (i.e., dry fit, trim parts, align edges, grind off ejector pin stubs etc). The kit is engineered to permit the future production of a trainer and a Target Tug version. The obvious indication for different versions (apart from CA's announcements) is the top-rear fuselage insert.
Fuselage The long, skinny fuselage has almost no structural rigidity by itself. The cockpit subassemblies and the top insert should provide the stability when assembled. Nevertheless, I would recommend great care (and lots of test fitting) to ensure that the top insert matches the width of the fuselage and that the wing-roots are wide enough to meet the top sections of the wings without gaps. My sample has some excess plastic waste on the inside of the starboard fuselage that will need to be ground off before the cockpits are installed.
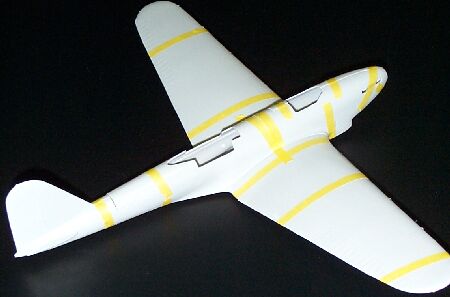
Wings, Undercarriage and Tail Surfaces The wings are supplied in five parts. Two upper wing halves overlap a lower centre-section and two outer lower panels. This method of engineering should ensure that the dihedral is set correctly. It should also indicate the correct width of the fuselage at the wing root. I am tempted to assemble the wing and gear wells first; then juggle the fuselage halves, the top insert and the cockpit tubs to get everything lined up properly. Trailing surfaces of all flying surfaces are admirably thin, although a few minutes careful scraping with a hobby knife will achieve a razor-sharpness. The gear wells are nicely detailed with plastic and resin parts. The modeller is required to supply their own stretched sprue or rod stock for the trailing struts. If the resin and vacform option is chosen for the landing lights, the position must be cut out of the leading edge of the wing. Remember - measure twice and cut once! The horizontal tail surfaces are butt-jointed to the fuselage. It may be helpful to drill out a few holes and add some styrene or brass rod to reinforce the join.
The general fit looks pretty good, but the biggest challenge by far will be the alignment and fit of the fuselage. Continually check the width of the fuselage at the front and back of the top insert, and at the wingroot, during construction. If necessary, be prepared to add a spreader bar between the fuselage halves at the wing root. It may also be necessary to add a thin wedge between the fuselage halves behind the top fuselage insert. The insert looks a little wider than the fuselage at this point. With careful preparation, it should be possible to get a near-perfect fit for the top insert. The moulded lip at the fuselage-insert join will help achieve this. The fit of the wing at the lower fuselage (front and rear) seems excellent.
Classic Airframes' new series of Fairey Battle kits is another brave and interesting choice from this short-run manufacturer. With its fine engraved detail, its excellent resin parts and attractive decals it supplies almost everything needed to create a convincing replica of this important but vexed aircraft. The only additional component required is a degree of modelling skill. This kit will not fall together. It does not have locating pins and the plastic parts have plenty of flash. Alignment requires patience and forethought. In other words, this is not a Tamiya kit. Furthermore, it is unlikely that we will see a Tamiya Fairey Battle. However, if you are a fan of early-war RAF aircraft and don't mind flexing your modelling muscles to achieve a good result, Classic Airframes' Fairey Battle is the kit for you. Recommended.
Thanks to Jules Bringuier of Classic Airframes for the review sample. Classic Airframes kits are available in Australia via JB Wholesalers and worldwide through hobby retailers. Review and Images Copyright © 2000 by Brett
Green
| ||||||||||||||||||||||
 The
plastic is shiny and smooth - no rough surface texture as sometimes experienced
with earlier CA kits. It is also quite soft and pleasant to work with. Sprue
attachment points are reasonably small. In common with most short-run kits, many
parts suffer from a degree of ragged flash. Mating surfaces should also be
lightly sanded to ensure trouble-free assembly. The inner surface of the major
parts sport large raised ejector pins. These will interfere with assembly, but
will not be visible once the kit is completed. The ejector pins will easily be
dealt with during cleanup using a pair of side-cutters.
The
plastic is shiny and smooth - no rough surface texture as sometimes experienced
with earlier CA kits. It is also quite soft and pleasant to work with. Sprue
attachment points are reasonably small. In common with most short-run kits, many
parts suffer from a degree of ragged flash. Mating surfaces should also be
lightly sanded to ensure trouble-free assembly. The inner surface of the major
parts sport large raised ejector pins. These will interfere with assembly, but
will not be visible once the kit is completed. The ejector pins will easily be
dealt with during cleanup using a pair of side-cutters.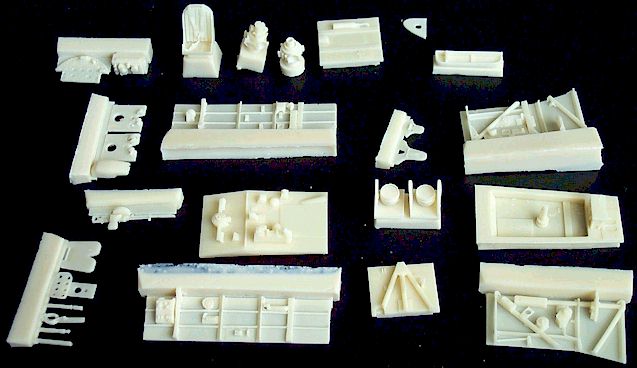
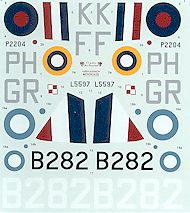 Markings
are provided for three aircraft - two RAF machines and one Greek. They all wear
a colour scheme of Dark Green, Dark Earth with Black undersurfaces. One of the
Battles of 301 (Polish) Sqn RAF features a gigantic fin flash. A colour foldout
guide will assist painting and decal placement. Federal Standard references are
supplied, but no cross-reference to model paints although this should not cause
a problem with such a common colour scheme. Decals are printed by Microscale.
The colours look good and registration is perfect.
Markings
are provided for three aircraft - two RAF machines and one Greek. They all wear
a colour scheme of Dark Green, Dark Earth with Black undersurfaces. One of the
Battles of 301 (Polish) Sqn RAF features a gigantic fin flash. A colour foldout
guide will assist painting and decal placement. Federal Standard references are
supplied, but no cross-reference to model paints although this should not cause
a problem with such a common colour scheme. Decals are printed by Microscale.
The colours look good and registration is perfect.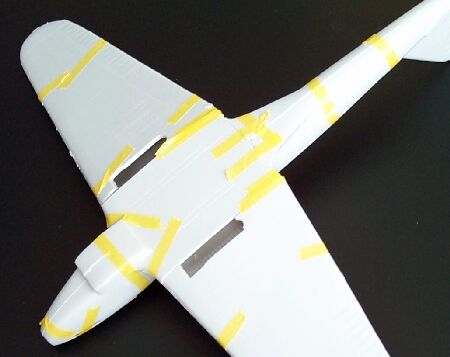 I
have already dry-fitted the main components.
I
have already dry-fitted the main components.