|
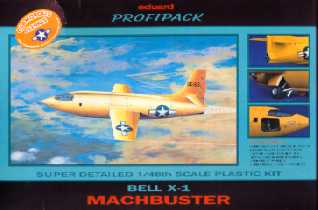
Bell X-1 Box Art |
| Catalogue No.: | 8032 Profipack |
| Scale: | 1/48th |
| Media: | Plastic and Multi Media (see text) |
| Review Type: | In-Box and Dry Fit |
| Rating: | Recommended for Experienced Modellers |
|
Bell X-1 Box Art |
B a c k g r o u n d |
The Bell X-1 hardly needs an introduction. Piloted by Capt. Chuck Yeager, it was the first aircraft to break the sound barrier on October 14th 1947. Eduard’s 1/48th scale releases mark the first time this historically significant aircraft has been available as an injection molded kit in this popular modeling scale. The subject of this review is Eduard’s "Profipack" kit # 8032. This is basically an upgraded version of their earlier X-1 kit. The difference is the inclusion of resin and photo-etched detail parts.
I n t h e B o x |
The forty-four plastic parts are representative of Eduard’s latest efforts, being cleanly molded with finely engraved surface detail, but lacking locating pins. I was pleasantly surprised to find that the wings were molded as single pieces, with fairly sharp trailing edges. As is typical of these short run kits, some of the smaller parts are rather thick, and lack crispness. In this kit, the main landing gear doors in particular are quite thick, but overall the plastic parts are quite useable. Also included in the plastic parts are two sets of horizontal stabilizers for each of the two aircraft that can be built from the kit. The injection molded clear canopy is also quite well done, being very clear and featuring sharply defined frame lines.
32 photo-etched parts include three different instrument panels for each of the aircraft at various times in their service lives; along with three printed clear backings with the instrument faces. The rest of the photo-etched bits are used to detail the landing gear, cockpit, fore and aft landing gear well bulkheads, and rocket motor exhaust.
The resin parts are mainly for the cockpit. They include the distinctive left-side wall console as well as other various small instrument clusters situated around the cockpit. The replacement main wheels are real gems. These have a very nice diamond tread pattern cast on them as well as the spoke wheel detail and brake discs. If you take a look at the plastic versions that these replace, the difference is quite obvious.
C o n s t r u c t i o n - F i r s t L o o k |
The instructions are very good with clearly drawn assembly diagrams. All parts are numbered and paint call-outs clearly marked. I test fitted many of the parts to see what was in store when construction of the kit commenced, and found that the fit of the major components was very good. The fuselage halves match up well despite the lack of locating pins. The slots in the fuselage wing roots that receive the tabs molded to the wings needed to be enlarged slightly to achieve the best possible fit of the wings, and a small amount of putty will be required to completely eliminate the seam. The cockpit fits well too, though the fit of the rear bulkhead at the top of the fuselage leaves a slight gap. This is not a problem however, as once the windscreen is in place it is impossible to see. The nose wheel well is part of the cockpit assembly, and lacks interior detail, but it is so small that once the strut is in place this will not be too objectionable.
P a i nt S c h e m e s a n d D e c a l s |
Four paint schemes are illustrated in the instructions, along with painting and decaling information. The decals are the only real shortcoming of the kit. While many stencil decals are provided, most of which are actually readable, the national insignias suffer from bleed through of the blue ink onto the white areas. They take on a fuzzy appearance around the edges where the two colors meet. The "Glamorous Glennis" legend for the nose of Yeager’s X-1 is a two piece affair, while the red letters are correct, they are to be applied over a blue outline. This is incorrect - it should be silver. I still haven't quite figured out how I will solve this slight problem.
C o n c l u s i o n |
I was very impressed with this latest release from Eduard, and I am looking forward to completing the model very soon. I would recommend this kit for experienced builders due the resin and photo-etched detail parts, though less experienced modelers can pick up Eduard’s regular version of this same kit, without the extra detail parts and still build a decent model of the actual aircraft (and at a slightly cheaper price). While the resin and photo-etched details add about $10.00 to the price of the "profipack" kit, it still is not a bad value, considering that most serious builders would invest in after-market details anyway. Overall, everything is provided to build an accurate, highly detailed replica out of the box.
Ernie Schafer
Back to HyperScale Main Page
Back to Reviews Page