Home | What's
New | Features
| Gallery |
Reviews | Reference
| Forum
| Search
Home | What's
New | Features
| Gallery |
Reviews | Reference
| Forum
| Search
|
|
|
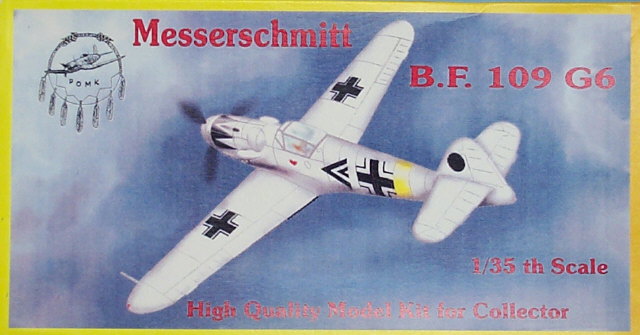
Messerschmitt Bf 109G-6 Pend Oreille Model Kits
Reviewed by Brett Green
The Messerschmitt Bf 109 must rate as the most popular aircraft modelling subject of all time. The Bf 109 has been represented in large scale on a number of occasions in the past, including a 1/24 scale Bf 109E by Airfix, and 1/32 scale versions by Hasegawa, Matchbox and Revell. I have always wondered why no manufacturer produces aircraft in 1/35 scale - the entrenched scale of choice for modellers of military vehicles. There is a bewildering range of cars, trucks, figures and diorama accessories in this scale. It would be quite appropriate for some of these to share a base with a 1/35 scale fighter aircraft. Pend Oreille Model Kits have addressed this shortcoming with their brand new 1/35 scale Messerschmitt Bf 109G-6.
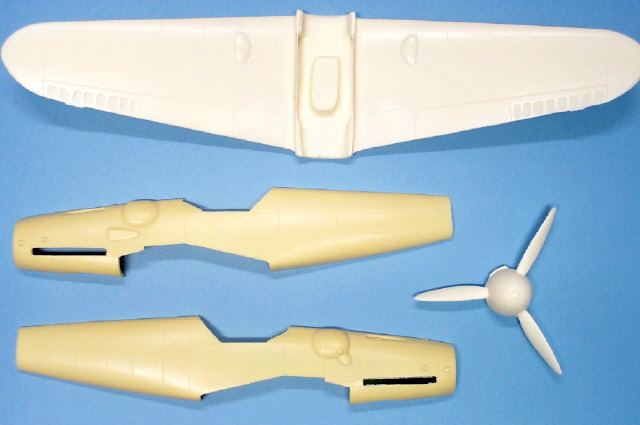
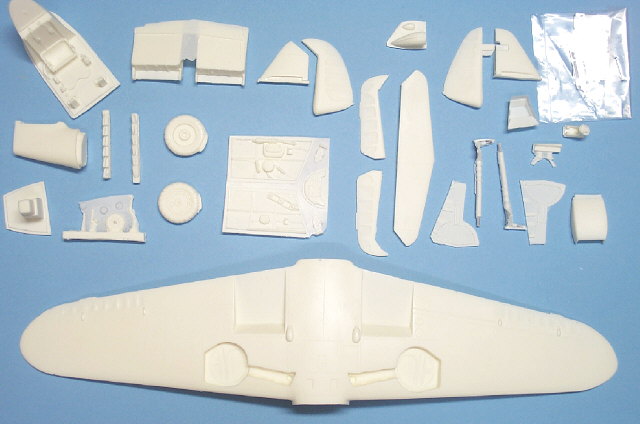
The kit is packed in a surprisingly small box. The 1/35 scale Bf 109G-6 comprises of just 39 resin pieces, with two foil parts and two sets of two vacform canopies. Decals for two aircraft are included. Resin parts will be familiar to those who have seen POMK's earlier releases. Most are an off-white colour with a flat surface texture. The fuselage halves are cast in a butterscotch-coloured resin that has a slight sheen. Panel lines are evenly engraved. Detail on all parts is crisp, though not quite to the same standard as the current vanguard of resin manufacturers. The very pale coloured resin does not create the best impression - detail tends to be lost due to the light shade. Painting should significantly highlight and improve the detail.
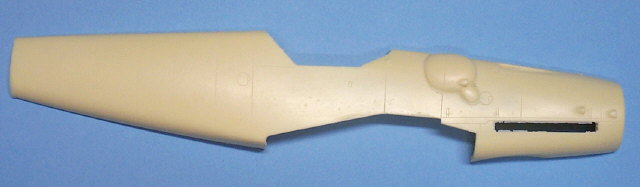
Considering the size of some of the parts, there are surprisingly few imperfections and no warping in my sample. There are a few pinhole marks just below the surface of the wings, but these will be thoroughly covered with a coat of paint. There is some rough waste material in a couple of difficult places - mainly where parts have been undercut. Examples include the grilles of the wing radiator and oil cooler faces. There is also an awful lot of flash, but this is to be expected and will be quickly dealt with using a sharp hobby knife. Casting blocks will not present much of a problem. Some chunky residue will have to be ground off the fuselage nose and the back of the spinner. A razor saw or a motor tool will be helpful for these jobs. The wingspan and fuselage length are accurate to within two millimetres. As far as I can tell, the relationships between the major components of the aircraft look good too. The model passes Test No. 1 - it looks like a Bf 109! The kit offers the option of tall tail or standard; and framed hood or Erla Haube. These options permit the modeller to build either a Bf 109G-5, G-6 or G-14. The fuselage is cast in two hollow halves. Intake scoops, interruptor housing bulge, MG bulges and barrels are cast in place on the fuselage halves. The MG131 barrels are drilled out, but one side on my sample will need a little waste material to be cleaned out of the narrow space between the MG barrel and the sides of the trough. The Starboard engine cowling features the small bulge and scoop typical of the Bf 109G-5 and G-14. It was not unusual for this style of cowl to be fitted to the Bf 109G-6 as well. Check your references - if your subject aircraft did not carry these extras it will not be difficult to remove them.
The oil cooler is a separate part. The housing features an integral grille that should look good under a coat of paint and a wash to highlight the detail. The tail unit is separate. Tall and standard tails are supplied. Both feature a fabric-covered rudder and no trim tabs. Take note that some tall-tail machines featured wooden or metal rudders. It will be a simple matter to fill and sand the fabric texture if this is the case with your modelling subject. Elevators are supplied separately. The full-span horizontal stabiliser has a curved recess at the hinge line to facilitate positioning of control surfaces, as does the vertical tail. Remarkably, the wing is cast as a single piece - and a very nice bit of casting too. The wing features small wheel bulges and wheel well structural detail. Trailing edges of the wing are quite thin, but a swipe with a sanding stick won't hurt. The leading edges look good - no pin holes or seam lines. Fabric detail on the ailerons may be a touch exaggerated, but may look more subdued when painted. The fuselage and the wing mate at the upper panel of the wing root. Take care not to trim off the small tabs that help locate the wing to the fuselage! Wing radiator housings are separate, and also have the grille face moulded on. My only concern with the wings is that the dihedral looks a little extreme.
Cockpit detail is not totally accurate for a G-6. The biggest shortcoming is the starboard sidewall. This displays a strange, blobby radio switch panel and a fuel line to nowhere. A slightly undernourished pilot's harness is moulded in place. To its credit however, the instrument panel is configured correctly and the door to the pilot's stowage bin is represented complete with hinge line. The main wheels are the narrow 660 x 150mm variety. The style of hub supplied is typical of early G-6 models. Each main undercarriage leg is reinforced with a narrow steel rod. The tailwheel strut is the sort style, with the dust cover cast in place. The propeller, hub and spinner are cast as a single unit. The shape of the spinner looks good, but the VDM propeller blades may be slightly skinny at the ends. The omission of a 300 litre drop tank or rack is somewhat surprising considering how commonly they were fitted. Two sets of each canopy (framed and Erla Haube) are supplied. Canopy frame detail on these vacform parts is a little soft, and one set of the clear parts is quite cloudy and textured. A trip to the Future bath and careful painting will help.
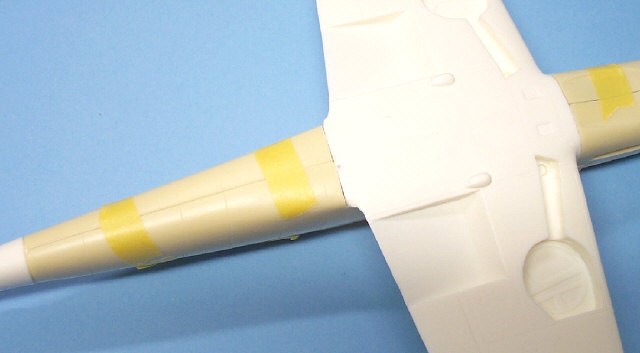
I have already test-fitted the main components of the kit. The fit of the fuselage halves is good. Panel lines match at top and bottom. I also fitted the rear fuselage plug. Some excess material had to be removed from the rear fuselage to achieve the correct fit. When in place, there is a slight step on each side between the fuselage halves and the rear plug. This can be dealt with using a thin wedge of plasticard between the fuselage haves; or can be smoothed with putty after assembly. The instructions suggest that the tail unit should be assembled before attachment to the fuselage and I strongly agree. This method is essential to accurately align the tail surfaces with the fuselage.
The fuselage assembly sits astride the one-piece wing. The engineering and fit of this crucial join is very impressive. There are almost no gaps at the wing root and lower fuselage, and the join feels substantial even dry-fitted.
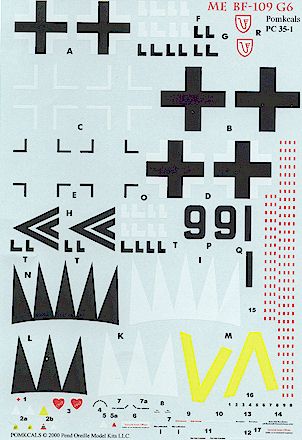
Pend Oreille should be applauded for their pioneering move into 1/35 scale aircraft modelling. This Messerschmitt Bf 109G-6 provides a unique opportunity to place large-scale aircraft and military models side-by-side. Apart from its exclusivity, POMK's Bf 109G-6 is an interesting model in its own right. Outline accuracy, engineering, fit and options are all impressive. It is expensive, but within the expected range for a large resin kit. The kit's only weak points are its poor decals, some minor details and vague instructions. Despite my nitpicks, this is the best large-scale (ie bigger than 1/48 scale) Messerschmitt Bf 109 available. Patience and careful preparation will be rewarded with a striking result. I can't wait to start mine! Recommended. Thanks to Lionel from Pend Oreille Model Kits for the review sample. Pend Oreille Model Kits are
available at good hobby shops and mail-order houses, Review and Images Copyright © 2000 by Brett Green
| |||||||||||||||||||||||
 I
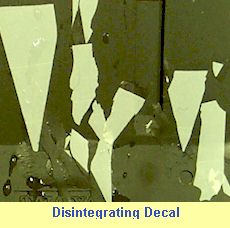
tested one of the white decals to check opacity. The decal was very
brittle - it broke into ten pieces when removed from its backing. Extreme
care will be required to successfully place these decals on the model.
Considering their fragility, the 8-piece swastika markings will be
virtually impossible to apply. Opacity is also poor. The model colour
clearly showed through the white decal.
I
tested one of the white decals to check opacity. The decal was very
brittle - it broke into ten pieces when removed from its backing. Extreme
care will be required to successfully place these decals on the model.
Considering their fragility, the 8-piece swastika markings will be
virtually impossible to apply. Opacity is also poor. The model colour
clearly showed through the white decal.